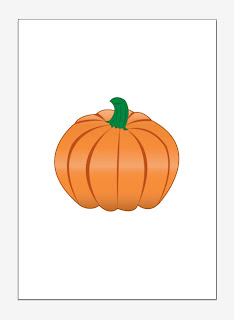
Here is what your pumpkin vector will look like when it is finished.
First of all open Adobe Illustrator and click new to open a new document. Then make sure you fill colour is blank but the stroke colour is filled and click on your pen tool. Start to draw the outline of the main shape of your pumpkin like below.
Once you have drawn this out you want to fill it. I choose to fill it with a gradient to give a bit of volume to the shape. Go to windows drop down menu, click swatch libraries, then gradient then fruit and vegetables, then choose the carrot gradient. If you hover over the gradient swatch you will see the name of it.
Click on your gradient tool to make it vertical by dragging it up or downwards and it should look like the image below.
I filled my stroke colour with a dark orange C 0 M 75 Y 100 K 25.
Now you need to give you pumpkin detail to make it look realistic. Click new layer (name your layers as you go along) and choose your pen tool again then start drawing skinny crescent moon shapes and fill then them with the same colour as your stroke on the pumpkin shape. You can see the desired effect in the image below.
Now your pumpkin is starting to take shape (excuse the pun). Now we will add a green stubb on the top of the pumpkin. Make a new layer for this. Get your pen tool and start to draw a stubb and fill with green C 100 M 0 Y 100 K 25 and fill the stroke with a darker green C 100 M 0 Y 100 K 50. Add some detail into your stubb using the pen tool again if you wish. I added some shadow lines in same green as the stroke of the stubb as you can see below.
When you have this done add a new layer and we will start the eyes and the mouth of the pumpkin. Again select your pen tool and start draw the eye like a triangle turned sideways. I curved the side of the eye for a better shape. When you draw one, select it, hold Ctrl and Alt and drag your mouse away from the eye to make a copy of the eye then with the copied eye selected go to windows and transform and click the down arrow at the top left to see the drop down menu. From that click horizontal to change the angle of the eye. Fill the eye with a yellow gradient, I thought it best to make a gradient with light and dark yellow. Do the same for the mouth draw it to your desired shape and fill it with a gradient to match the eyes. You do not need to copy the mouth or change the transformation. It should look something like the image below.
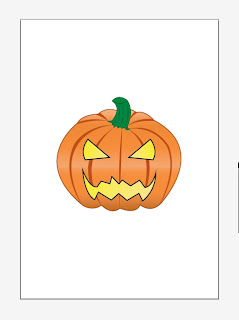
The last thing you need to do is fill the strokes with black on the shapes and now you have a very simple but detailed pumpkin vector. I hope you enjoyed this tutorial.


